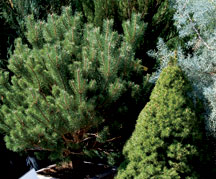
 When you buy one of Payne’s high quality, hardy evergreen trees for the holidays, keep in mind that they come in containers so that they can spend a brief time indoors as decoration, then be planted for a lifetime outdoors as a beautiful addition to your yard. There three very important things to ensure success with a live tree:
- Keep the tree’s rootball moist
- Don’t leave the tree indoors longer than 5 days
- Plant it with an eye toward its future growth.
Please keep in mind that live Christmas trees cannot be guaranteed once they leave the Payne’s Nursery premises, so be sure to follow these instructions carefully to ensure enjoyment of the tree for years to come.
If the tree is not taken indoors immediately, place it outdoors in a location sheltered from drying winds. Water it thoroughly at once, then water every 7 to 10 days. 24 hours before bringing it indoors, water it thoroughly one more time. We cannot emphasize enough that live evergreens should never be left indoors longer than 5 days.
Indoors the tree needs to be positioned near a cool window, away from fireplaces or other sources of heat (which could dry it out). Keep the rootball slightly moist at all times —water as needed. HINT: Place ice cubes daily on top of the rootball. Over the course of the day, they’ll melt slowly, keeping the rootball from drying out.
If decorating with holiday lights, be sure to use small, low-voltage bulbs that do not produce drying heat. LED lights work very well.
When it’s time to take the tree back outdoors, it will need to be re-acclimatized to outdoor conditions. Place it in a well lighted, wind-sheltered area such as a carport, a portal or a protected niche near a warm wall for 10 to 14 days before planting it in its permanent location.
Planting Your Live Payne’s Christmas Tree
- When the soil is unfrozen, dig a hole 1½ to 2 times the width of the container and slightly (2-4”) deeper.
- Set the excavated soil to one side and mix it 3 parts soil to 2 parts Payne’s Soil Conditioner™ and cover it with plastic so it remains dry and workable.
- Place a portion of this mixture (about 2 inches’ worth) in the bottom of the hole, tamping it down thoroughly so that the plant will not settle.
- Gently remove the tree from its pot. If the rootball has burlap around it, leave the burlap alone, but cut any twine that may circle the trunk. Also, remove any wire that might be around the rootball.
- Bring a hose to the planting site and fill the hole to about 1/3 or 1/2 of the depth of the hole.
- Gently slide the rootball into the hole. The water will help ease the tree into the hole and will also make it much easier to rotate the tree to face the direction you want.
- Start shoveling the soil and conditioner mixture in around rootball. The swirling water will help soil settle, eliminating air pockets.
- When the hole is filled with soil, turn off the hose and let the soil settle. You may need to add a little more soil after all the water has soaked in.
- Give your newly planted tree a good shot of root stimulant, diluted according to the directions on the label. Ask one of our Garden Center staff experts for recommendations.
Water the newly planted tree thoroughly every 3-4 weeks throughout the winter, gradually increasing the frequency as the soil warms and the tree comes out of dormancy.
- To increase watering efficiency, use extra soil to form a water basin above ground around the tree at the diameter of the drip line of the plant. Apply a 2” layer of mulch to the water basin to reduce evaporation.
- Give your tree a slow, deep watering once or twice a week for the first year, from planting time until the fall. This is essential for helping it establish healthy roots. In addition, water-stressed trees are highly vulnerable to insect and disease attack. In subsequent years, you can reduce the amount of water depending on the weather and the needs of the particular kind of tree you’ve planted.
- In spring, when new growth appears, apply evergreen fertilizer to the soil around the tree and water in thoroughly. Fertilize again in late summer.
